Build directions

It's really easy to build this bridge.
Suitable building order
- Resistors
- Capacitors
- Spade connectors
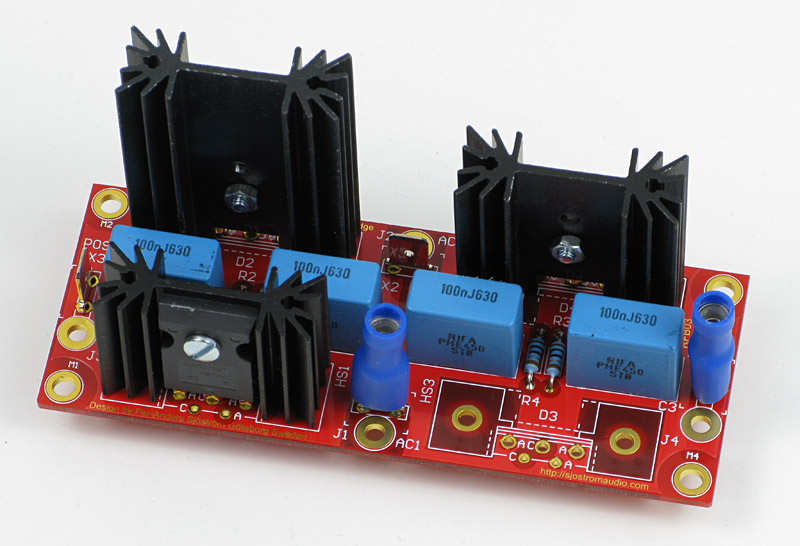
- Mount the diode to the heatsink. As you can see you can have different sizes of the heatsink, 25 mm (1"), 37 mm (1.5") or 50 mm (2 ").
- Mount the diode-heatsink package. For heavy duty applictions it could be wise to use heat compound between the diode and the heatsink.
You don't need any insulation because the heatsinks aren't connected to anything else than the cathode of the diode.
Mounting the heatsinks
Solder the heatsink with a very small drop of tin, just so it won't fall off. Then solder the diode. When the whole bridge is finished and tested you may solder the heatsinks a little bit better. This is just a precaution if you want to remove the heatsinks of some reason before you are completely finished. Once you have soldered them in they will be impossible to remove without damaging the pcb.
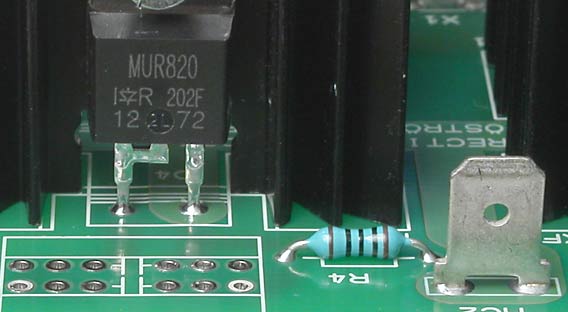
Soldering

The picture shows RFB01 but the problem is the same with RFB03 and even more accentuated since there is so much copper. Some parts are demanding in terms of heat. The pcb has thick copper which cools very effectively. Therefore you must "fire up" some pads. If you have a temperature controlled soldering iron turn up the temperature to max, maybe 450 deg C! Stop warming when the tin has start to flow up on the component side. See the picture above. Notice also that the lug (at the picture) had a thick oxide layer. The soldering joint isn't perfect. The tin hasn't wet the surface of the lug but still, the quality is fair.
