SPS-01 The Sjöström Power Supply
Click on the picture to get a larger view.
This design is based on Jan Dupont's idea . The goal was to make a huge power supply with high-end rectifiers and as versatile as possible.
Interesting features
- 2-layer pcb with 70 um (2 oz.) copper.
- 2 mm thick pcb.
- Gold pads.
- Discrete High-End rectifiers.
- Option for TO218, TO247 and TO220 diodes.
- Snubbers at each diode.
- LED's as voltage indicators.
- Bleeder resistors.
- Option for three different pinouts of the big smoothing caps including the high performance models from BHC.
- Huge 16 sqmm (AWG5) terminals from Phoenix.
- Fuse holder, both for european and american types.
- Terminal for series inductor.
The background
This design was created by Jan Dupont by he didn't have the time to organize any group buy over at www.diyaudio.com An another member offered some help but the whole thing went down into nothing. Here is where I came in. I thought this small project was perfect in order to learn the cad program but I wanted also to have responsibility for this design. Therefore some changes have been done.
The design
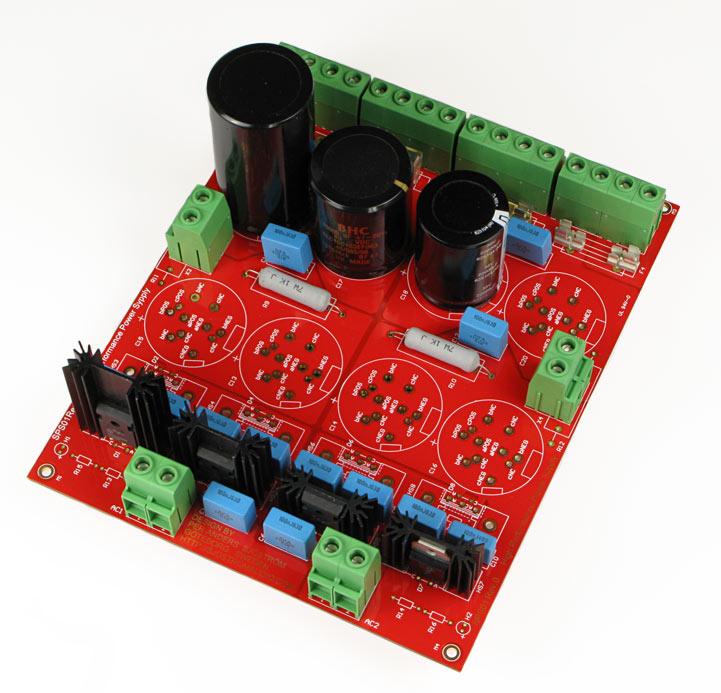
The design is based nearly to 100% of the original PSU board made by Jan Dupont. The board is designed to be high-end and this means that the board is rather large. I have chosen to have a bit thicker pcb material than normal because it can be rather heavy with all those caps.

The schematics
Click on the picture to get a larger view.
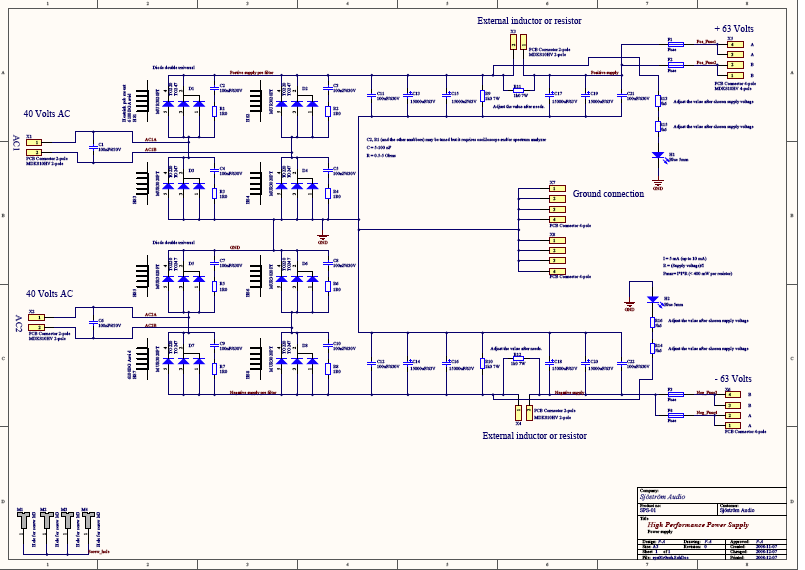
I recommend that you download the schematics and print it so you can follow the describing text more carefully.
The PSU consists of two halves and form a dual power supply fed from two individual transformer windings.
Circuit description
The rectifier bridge consists of D1-D4, D5-D8. Chosen diode is MUR3020WT but any dual diode common cathode with TO218 or TO247 case will fit. You can also use single diodes in TO220 case. The pcb has clear markings of anode and cathode in the silkscreen print in order to get the right diode.
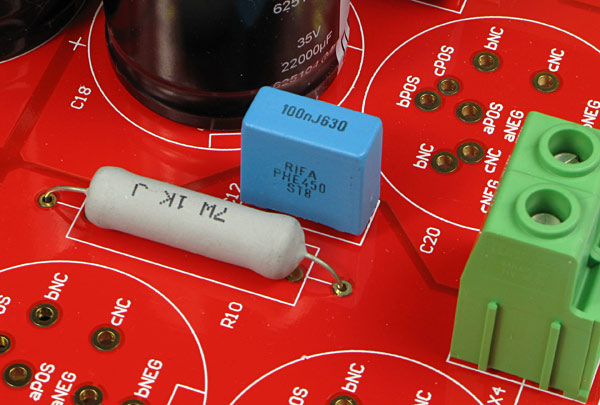
Each diode has also a snubber for reducing EMC. The right value depends of chosen diode and current. See the presented values as a start, not a final choice.
Different heatsinks
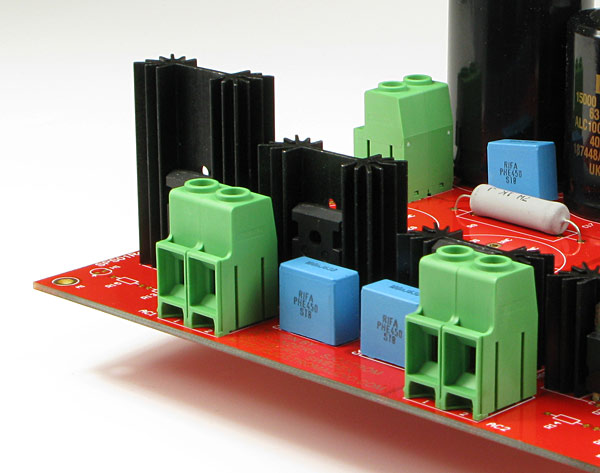
Depending of current needs you can choose different sizes of heatsinks. From left: 2", 1.5" and 1" high heatsinks.
LED's, voltage indicators
LED's (H1 and H2) are located at the input terminals. They can be any colour and can be tuned to shine as much as the double 0.6 watts metal film resistors (R13, R15 and R14, R16) can handle.
Bleeder resistors
Since you can mount at least 27000 uF x 8 it may be necessary to have bleeders in order for the power supply to get discharged. The value of the resistor is a trade-off between power dissipation and discharge time which is determined by the total capacitance and also of the amplifier in idle power consumption.
The external inductors
X3 and X4 are connectors for external inductors or resistors. You get a glims of X4 in the picture above.If you only want a smaller resistor there is place for two 7 W resistors at R11 and R12
The fuseholders
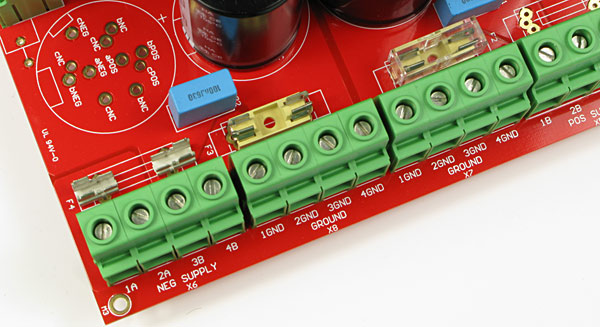
The pcb has footprints both for European 5 x 20 mm fuses and also for the American type 6.3 x 32 mm. This fuseholder can be seen at the left. At right the European fuseholder has a cover which is not entirely necessary if you have low voltages but can be wise since a short circuit will created damages.
The huge terminal blocks
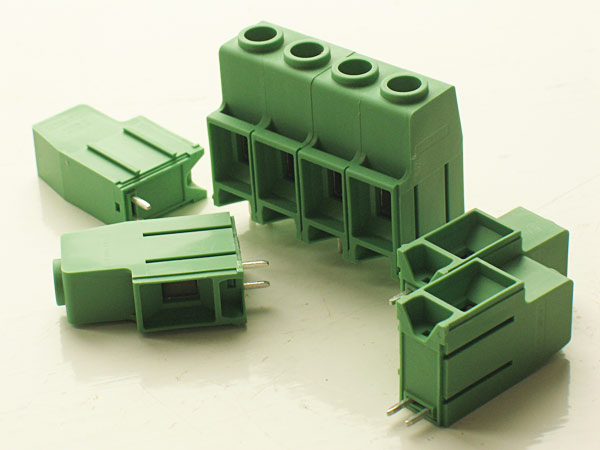
The chosen terminal blocks are huge, high-end you know, but not entirely necessary. Therefore you have additional holes for plain 10 mm terminals.
The smoothing caps
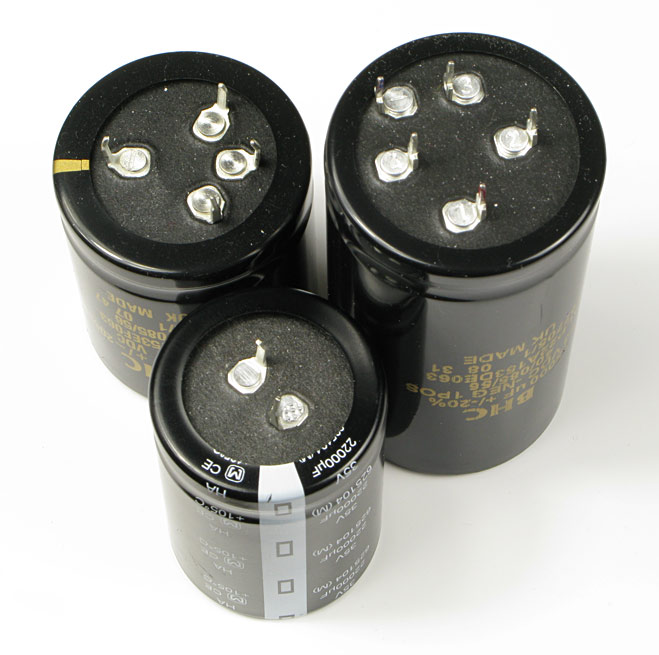
You can use three different pinouts of the smoothing caps. The most common types is the one with only two pins, called aPOS, aNEG at the pcb.The upper left cap is a heavy duty cap and has four pins because it weight more and needs a more firm mounting. It's called bPOS and bNEG in the pcb. The extra heavy duty cap from BHC has five pins and they are called cPOC and cNEG on the pcb. Those caps are really good but also really expensive.
The pcb layout
Click on the picture to get a larger view.
The board is rather large so if you want to check out the details, please download the pdf file instead.
Build directions
Click on the picture to get a larger view.
The heatsinks
There is nothing special to think about except for paying some attention to the heatsinks. They should be mounted approx. 1 mm above the pcb surface. Some heatsinks have the same potential as the groundplane but most of them don't. The heatsink is connected to cathode of all diodes.
Technical data
| Operating voltage: | Determined by used parts |
| Max current: | 30 A or determined by used parts |
| Dimensions: | 180.3 (7.1") x 220.3 (8.68") mm |

