Assembly instructions
This design is very easy to build. . You can solder the parts in the order you'll like but it may be practical to start with all low (height over the pcb) parts such as resistors and then take higher parts.
Start with all low parts except for the output power amp and the opamp.
- Opamp if it's a SMD type. It's hard to solder if you have any parts around the opamp.
- Resistors, jumpers, also at the transformer. See instructions below how to set the primary voltage 230 or 115 VAC.
- Zener diodes
- Diodes. Notice that the diodes, D9-D12, near the opamps are mounted in a special way, see the photo. They are standing up. Be careful when you bend of of the legs.
- Rectifier bridge. Don't cut the AC wires of the rectifiers in case you want to the each regulator with an external lab power supply.
- Plastic capacitors
- Transistors, voltage reference. Fat outline = LM431. Thin outline = LM329 or other 2-pin devices.
- LED
- Trim pot (if you use it)
- Fuse holder
- Varistor
- Capacitors, elelctrolytic
- Power transistor. Mount them first in the heatsink, then solder them. You won't need any insulation between the semiconductor and the heatsink but heat compund may be used to increase the heat transfer. Pay also attention to that the heatsink isn't in touch with the groundplane. Solder the heatsink into the pcb when you see that everything is working.
- Connectors
- Transformer. Wait with this until the regulators are tested. ATTENTION about the mounting direction, see details below
Besides from these instructions the regulator is pretty easy to build but pay attention how you should mount all polarized parts. See pictures below and also the pdf file. In the pdf file I have made placement pictures with extra clear markings for each part. Print it and have it beside you when you solder.
The Hahn transformer
230 VAC
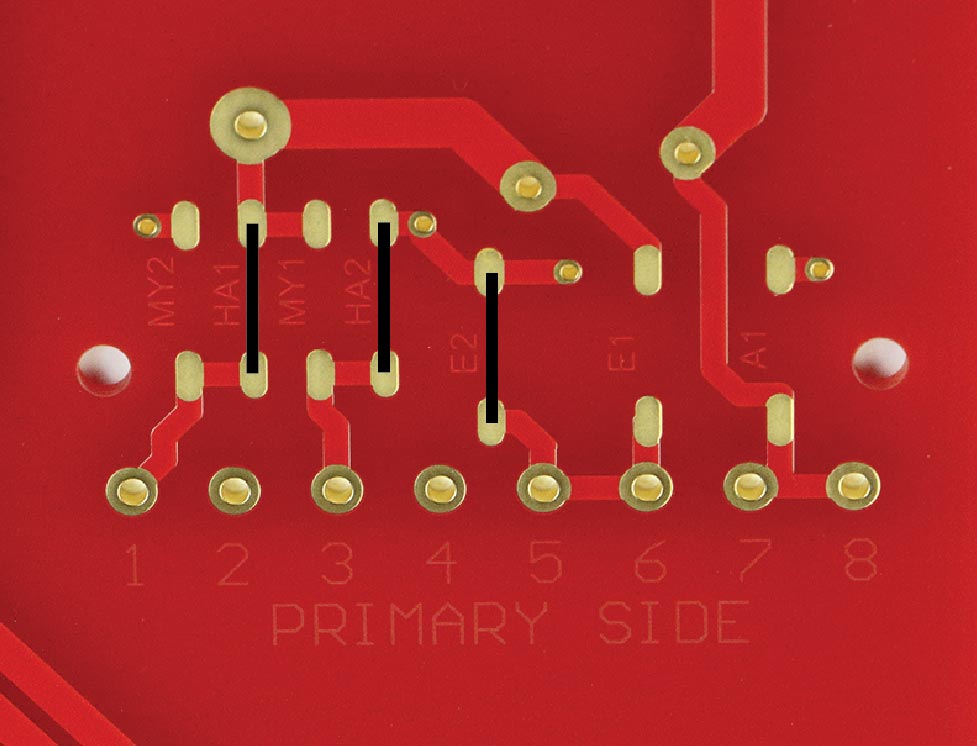
Hahn transformer, 230 VAC. Click on the picture to get a larger view.
In the soldermask you can see if you look closely, HA1 and HA2 (HA=Hahn). Put a wire in those positions. E2 is used for 230 VAC.
115 VAC
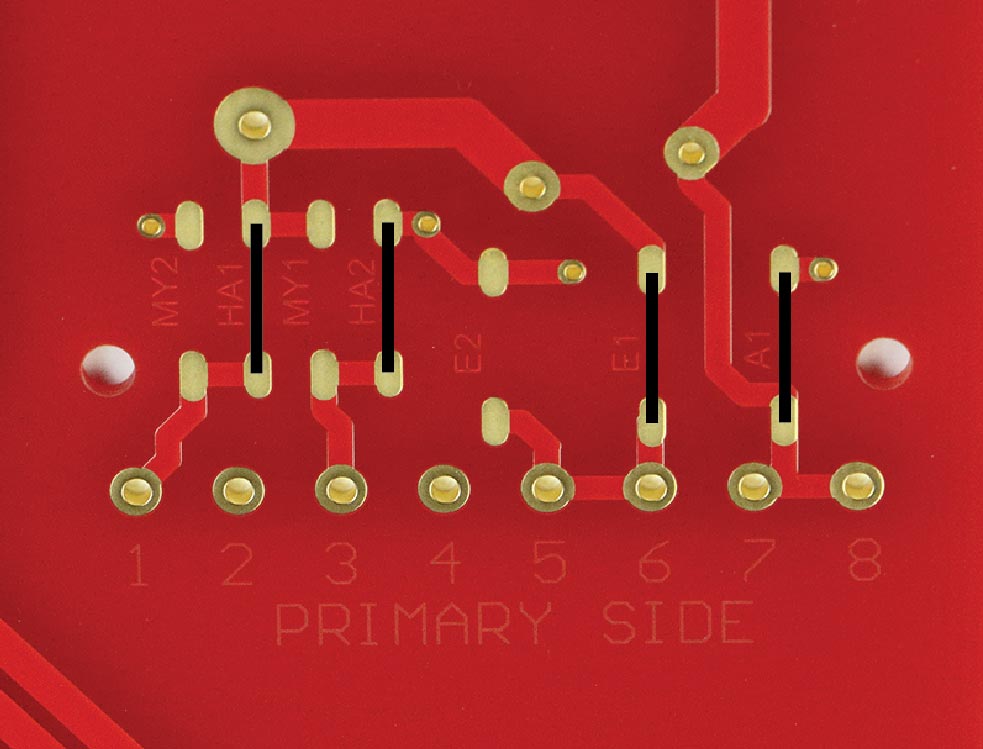
Hahn transformer, 115 VAC. Click on the picture to get a larger view.
HA1 and HA2 (HA=Hahn). Put a wire in those positions. E1 and A1 are used for 115 VAC.
The Myrra transformer
230 VAC
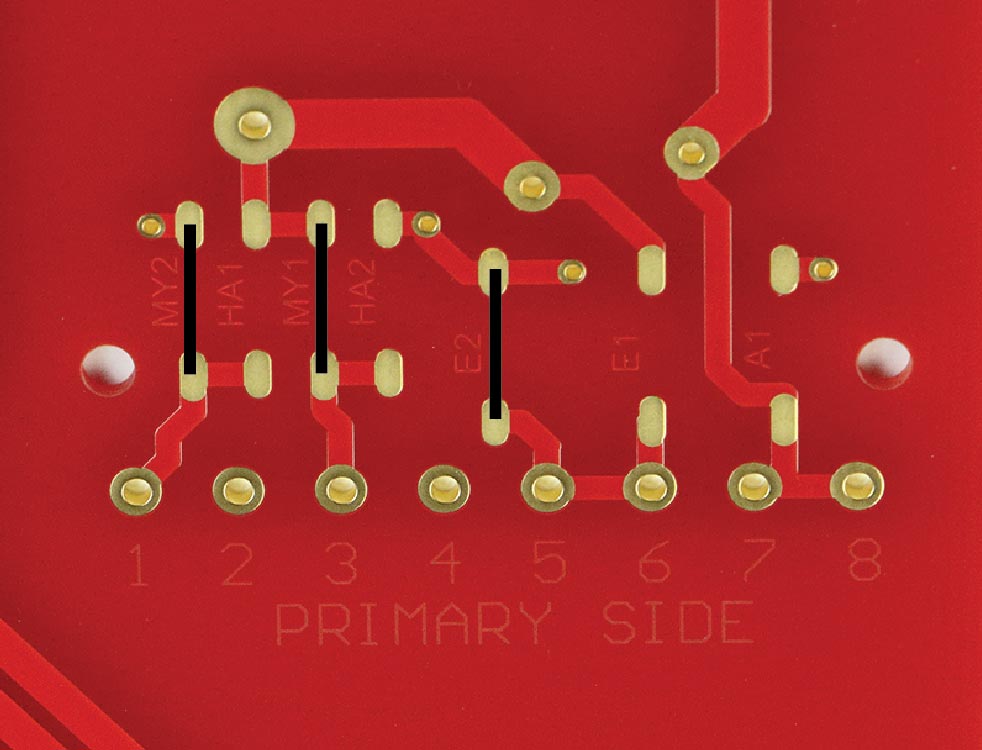
Myrra transformer, 230 VAC. Click on the picture to get a larger view.
MY1 and MY2 (MY=Myrra). Put a wire in those positions. E2 is used for 230 VAC.
115 VAC
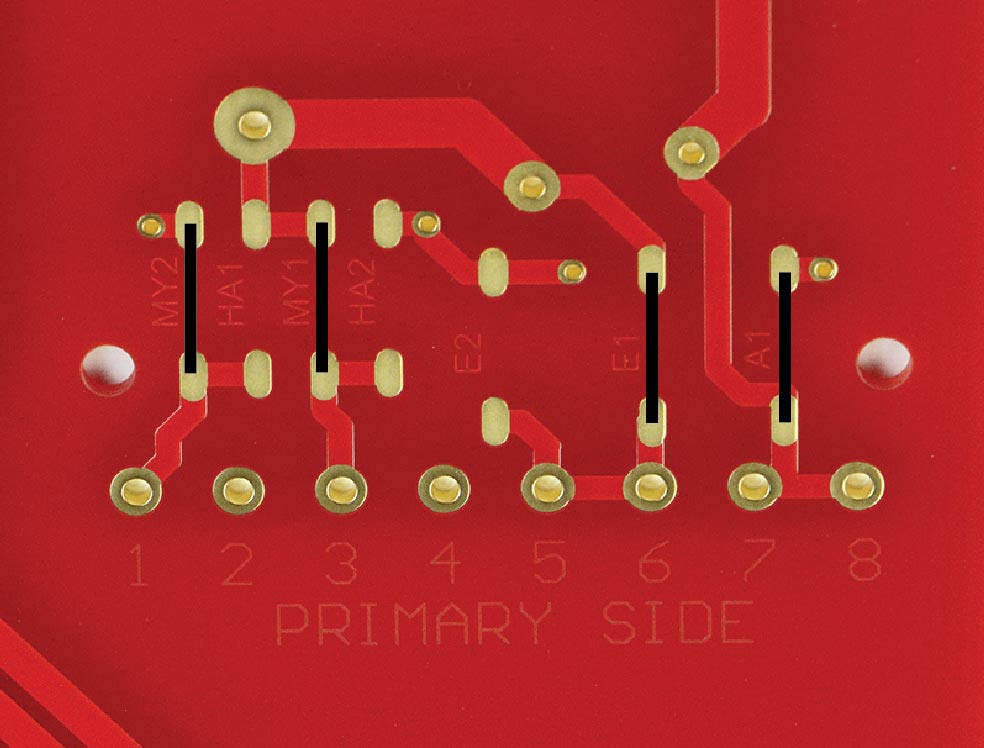
Myrra transformer, 115 VAC. Click on the picture to get a larger view.
MY1 and MY2 (MY=Myrra). Put a wire in those positions. E1 and A1 are used for 115 VAC.
Detail of the positive half

Click on the picture to get a larger view.
Parts for ± 15 volts out using LM431 and a Myrra transformer.
